Windows
TLDR
- Plan to remove trim on the exterior to replace a window, consider removing the interior trim as well
- Measure the rough opening, not the old sash; order the unit ¼ inch undersize for shimming. Best practice → pop one piece of trim to verify every dimension.
- Flash with a sill-pan first, then jambs. After insurance tape the sides then top
- Air-seal and insulate with low-expansion foam or backer-rod + sealant.
- Confirm smooth operation before and after foaming
- Code hot-spots: bedroom egress (R310), safety-glazing rules (R308.4.2 & R308.4.3), and ENERGY STAR v7 U-factor ≤ 0.22 in Michigan.
Overview
Windows touch structure, weather-tightness, finish carpentry, paint, and code compliance. Using new-construction units with flanges lets you tie into the weather-resistive barrier (WRB) properly but requires full access to the rough opening (RO).
Prerequisites
- Before you order windows determine the RO size and depth.
- Check the Window Order Checklist
Materials / Tools Needed
- Tape measure and level
- Pry bar, hammer, and 1.5" roofing nails
- Sill-pan flashing tape or metal
- Shims
- Low-expansion foam OR backer-rod and sealant
- There are good options to take the interior as well a
- Drip cap (if not integral)
- Interior casing, exterior trim or coil stock, paint/caulk
Process
- Ordering windows
- Remove a trim board, record RO dimensions
- Confirm style with the client
- Request a window quote from a dealer
- Confirm pricing and style with client
- Place the order
- Installation
- Protect finishes
- Remove ext trim and interior trim if necessary
- Install sill pan flashing
- Install window
- Shim up 1/4”, center left to right, tack one bottom corner, level the sill with shims, tack the other bottom corner
- Check plumb sides, then finish nailing
- Confirm banks of windows are level with each other and spaced properly
- Tape exterior sides then top
- Spray low expanding foam from the interior between the window and the rough opening
- Or install backer rod and sealant
- Or tape the frame to the rough opening with insulation of your choice behind
- Install interior casing, stool, apron; add exterior drip cap and trim or coil wrap, then paint/caulk.
Inspections
Windows aren't usually inspected unless as part of a Rough Building or Final Building inspection. The inspector will be looking for the following
- Egress Windows (emergency rescue openings - R310) – Sill ≤ 44 in. above finished floor; open area ≥ 5.7 ft² (above grade), width ≥ 20 in., height ≥ 24 in.
- Safety glazing adjacent to doors (R308.4.2) – Tempered if bottom edge < 60 in tall and glass is within 24 in. of a door
- Safety glazing in large low windows (R308.4.3) – Tempered when single lite > 9 ft², bottom < 18 in., top > 36 in., and walking surface within 36 in.
- Safety glazing in wet areas (R308.4.3) – Tempered when within 60 in. of a source of water (sink, tub, toilet, etc.).
Best Practices / Pro Tips
- Run a sealant bead behind top & side flanges (leave bottom open to drain).
- Slope the rough sill ¼ in. to create downslope before flashing.
- Add a back-dam on the interior sill edge to stop inward leaks.
Client Interaction / Communication Notes
- Advise that interior trim may not survive full-frame demo; budget for replacement.
- The builder should determine the size and fit of the new windows and guide the client on a style that meets their goals.
Window Specification Examples
Example Proposal/Contract Call Out
This is an example of what may be written in a build contract. Sometimes "final" window decisions are made before the contract is signed, but not always.

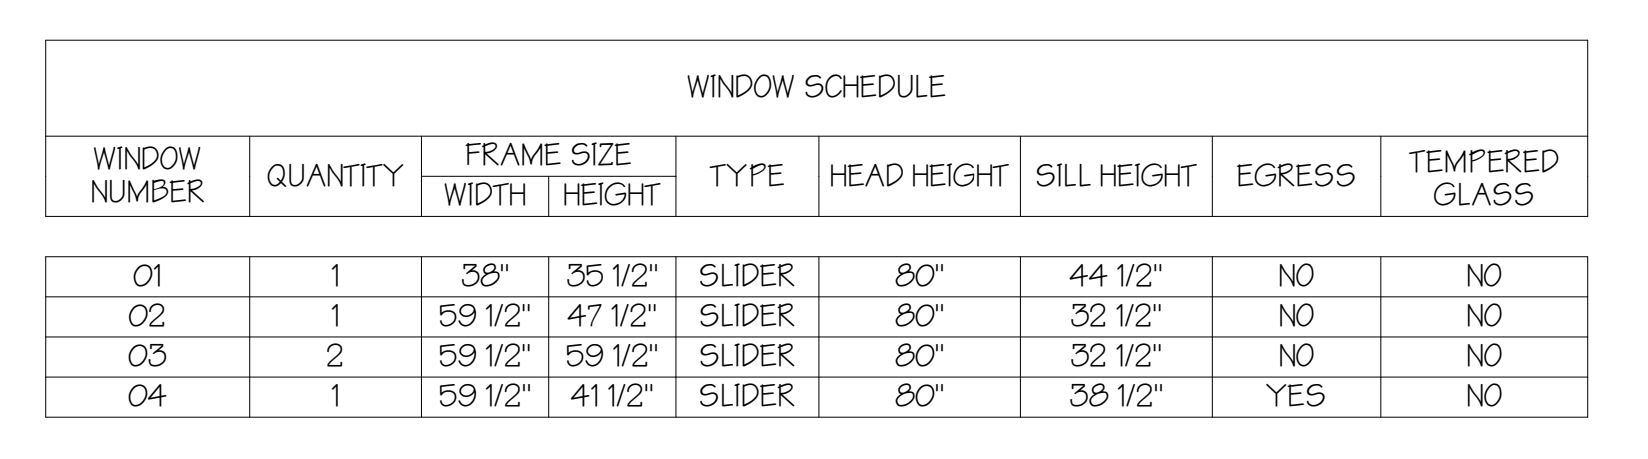
Example Blueprint Window Schedule
The blueprint often doesn't contain enough information to correctly or fully order a window. Compare the information here to the Example Window Quote below
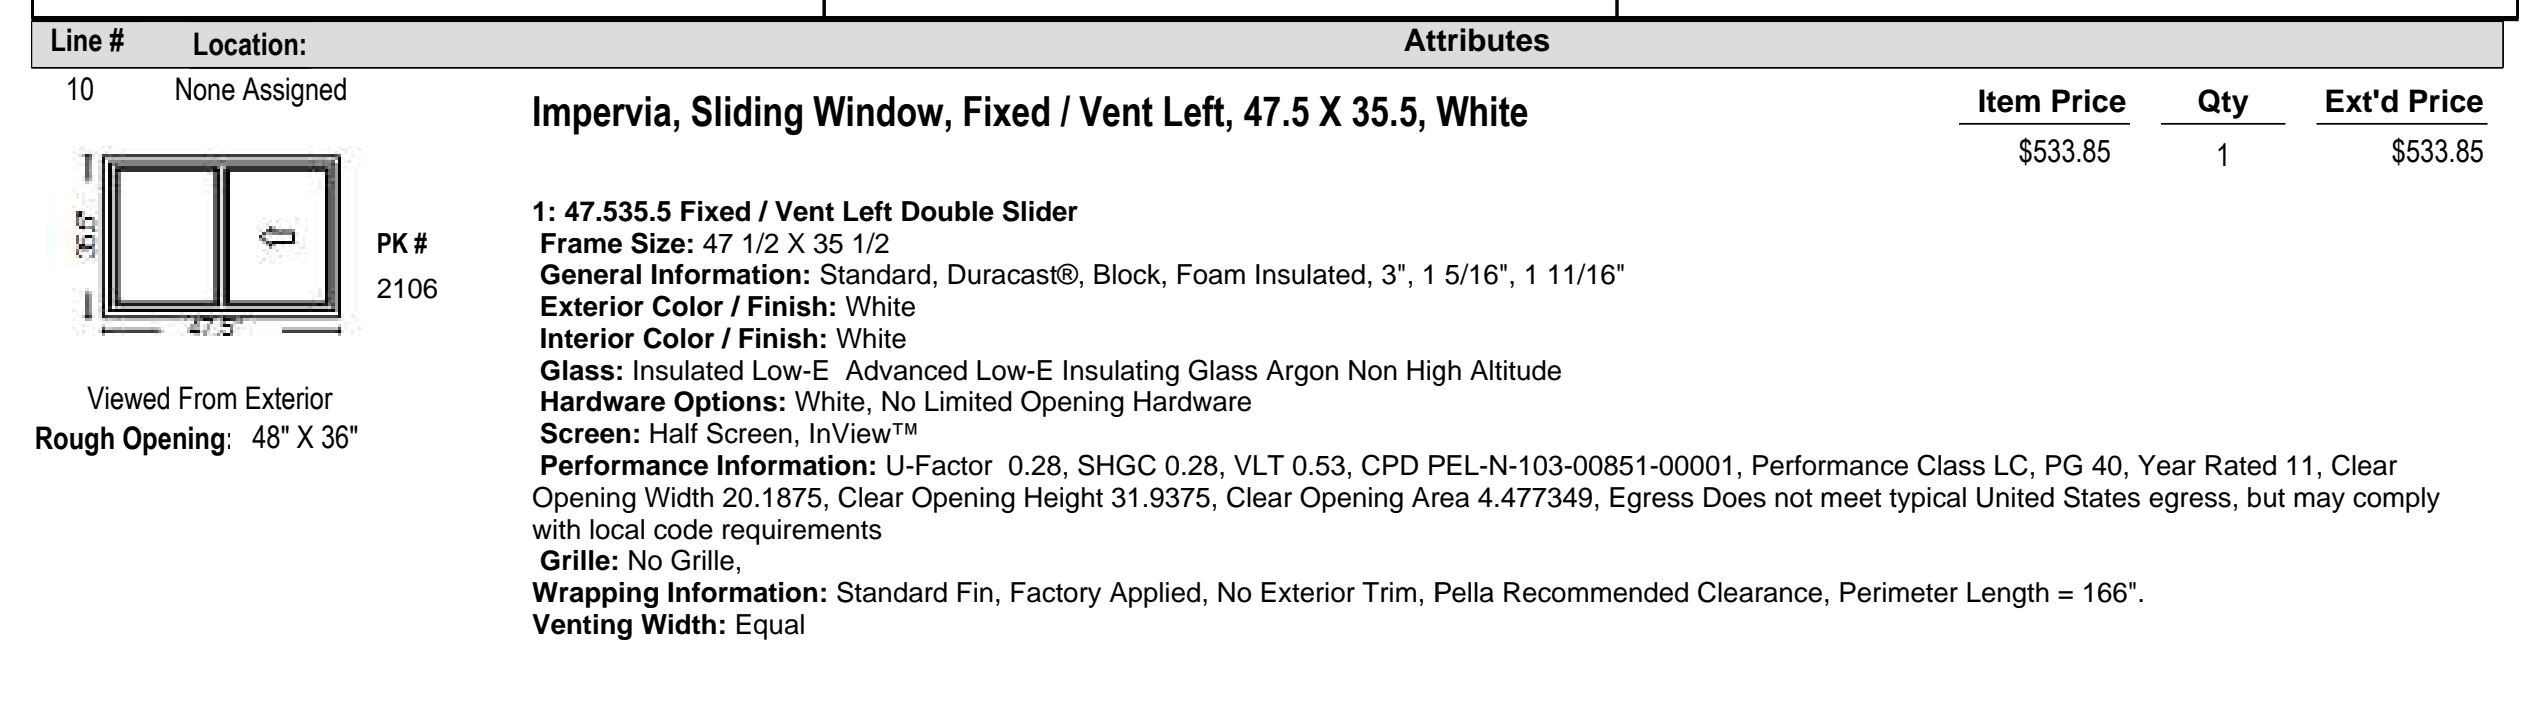
Example Window Quote
Note the jamb thickness, colors, screen style and color, slide direction, material, hardware specifics, etc.
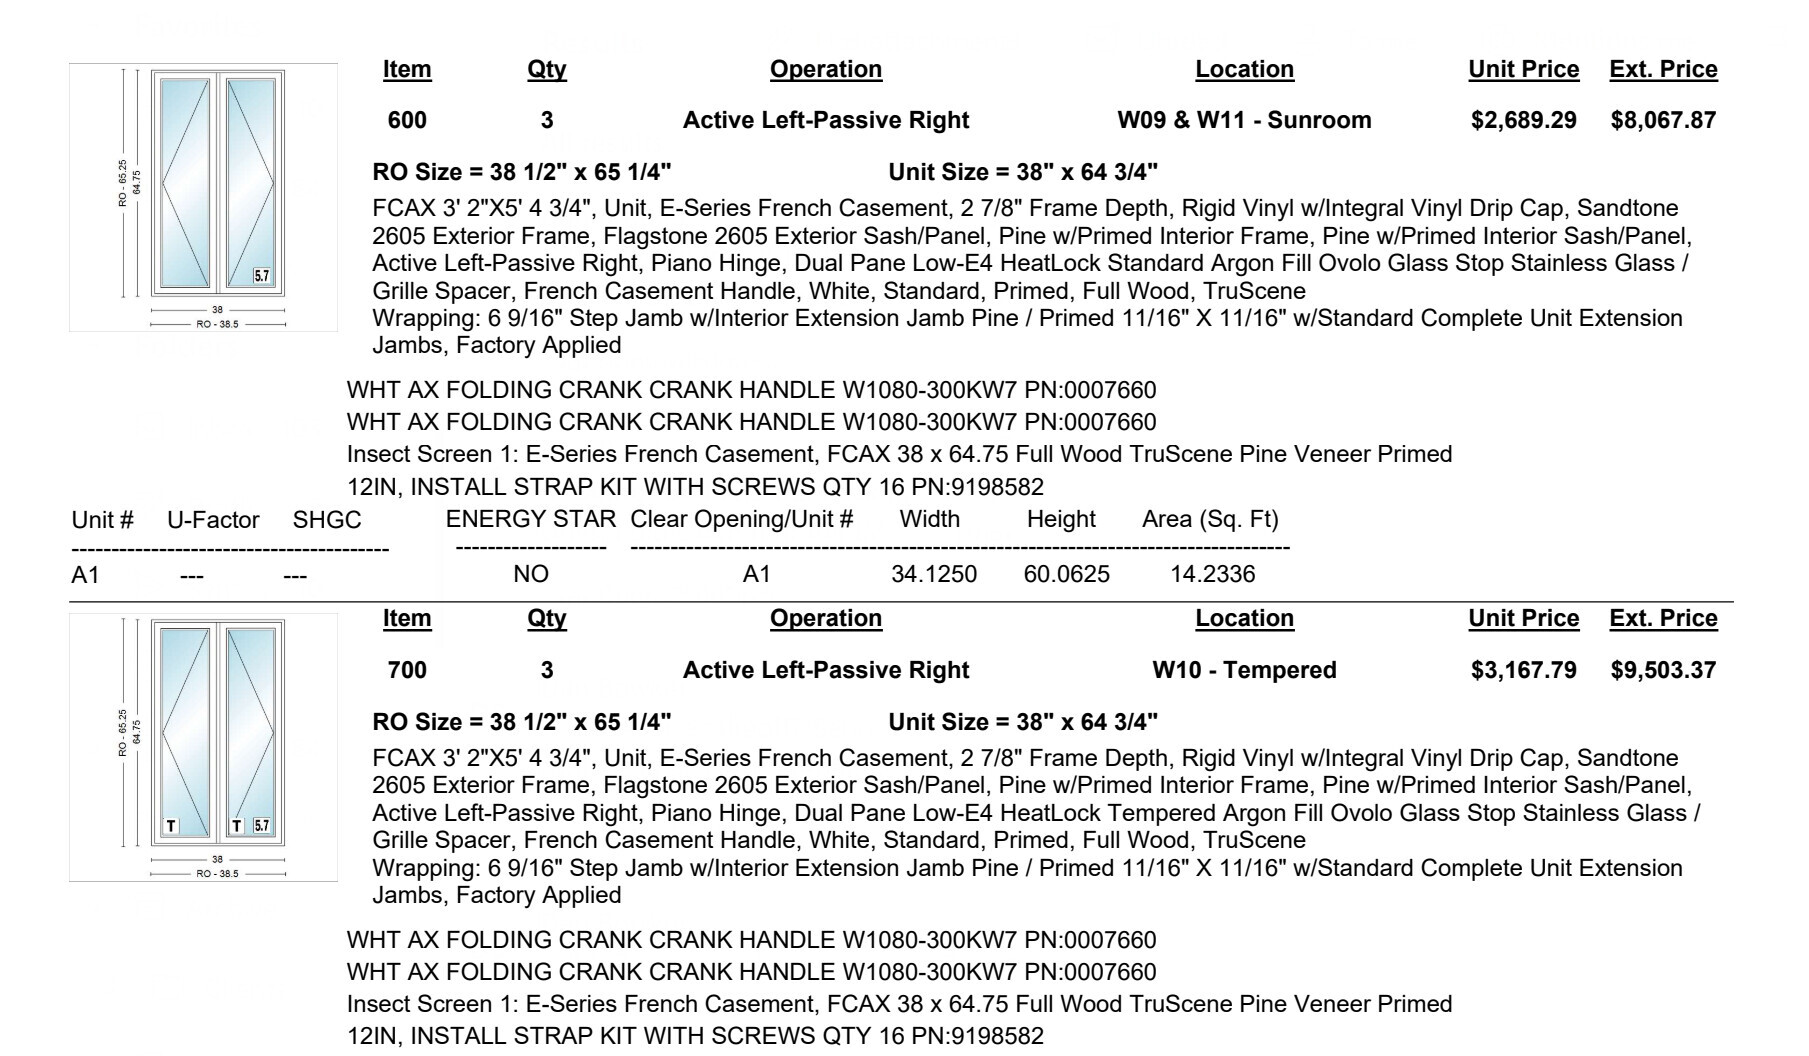
Additional Example Window Quote
Resources
Window and Door Install Checklist
ASTM E2112 - Standard Practice for Installation of Exterior Windows
AAMA 2400 - Standard Practice for Installation of Windows with a Mounting Flange